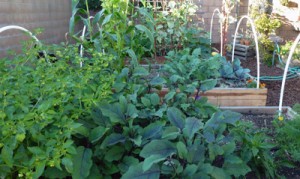
What started as a weedy patch in a California backyard is now a healthy, thriving vegetable garden with plenty of homegrown food to share with neighbors and friends. Take a mini-tour of this vegetable garden and learn how this clever gardener created her own DIY kitchen garden.
This year, I’m completely inspired by my friend Kathy. She has tackled a yard that was nearly overtaken by weeds and reclaimed the space to grow all kinds of vegetables, from corn to cucumbers and cabbage. Not only are her hours of hard work and determination impressive, but her garden offers valuable lessons to others eager to grow their own food.
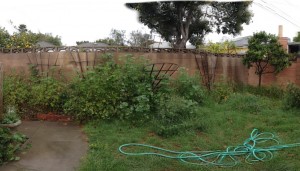 “I had a weed patch of a backyard that needed undoing,” explains Kathy. “Last spring I had plenty of time on my hands, so I was able to take on a vegetable garden project.”
The beginning gardener found ideas for her design in many places. “The biggest inspiration has been to see edibles being grown all over my neighborhood,” she recalls. “School yards, front yards, backyards, lots converted to community gardens. Even gorgeous magazines and blogs filled with color photos helped a lot.”
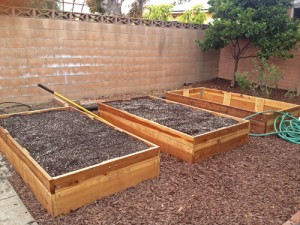 After digging up the weeds in her garden, Kathy laid out a weed cloth over the space, and covered it with several inches of wood mulch. This was to help keep the weeds under control in the future.
Even though she bought the mulch by the bag, the gardener admits mulch and soil amendments are much less expensive when bought in bulk. “I could have saved a lot of money by buying bulk,” explains Kathy. “Next time, that’s how I would do it.”
Each of the three raised beds is 8’x4’x18” and made of redwood. They were modeled after these online raised beds. But Kathy’s beds were filled with a special mixture she made with ½ compost, ¼ coir and ¼ perlite. She says it was a lot of work to combine and mix into the raised beds, and figures she might use premixed, bulk soil next time.
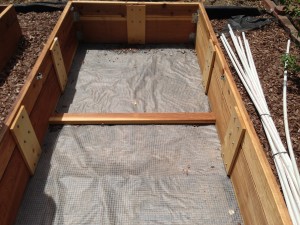
Gophers have been a problem in Kathy’s neighborhood, so she took special precautions by adding ½” hardware cloth before adding the soil mixture. So far, the critters haven’t been a problem in her yard.
 A drip irrigation system was added so the plants could be watered at the roots. This saves water and keeps the foliage dry, helping to reduce fungal diseases.
Kathy built three raised beds, because it’s a good minimal number to practice crop rotation. This is an old organic gardening method that involves rotating crops by plant families every year, so the plants don’t grow in the same place over and over. It’s an easy way to reduce pest and pathogen problems in your food garden. You just need to remember what you planted each year.
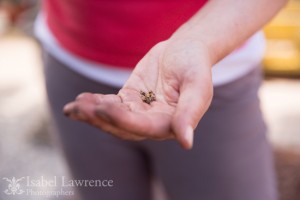
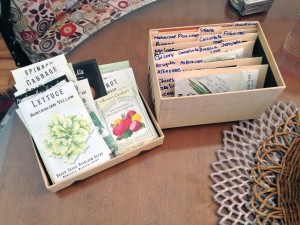
To help her remember the plant families, Kathy grows family members together and even organizes her seeds that way, as you can see above. This Seasonal Wisdom post has a list of plant family members, which will help you with practicing crop rotation.
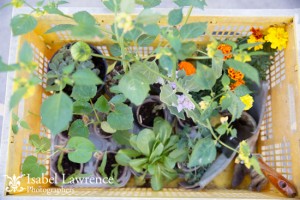
 On planting day, Kathy invited a few friends over to sow seeds and plant transplants into the new garden beds. We celebrated with a delicious breakfast served al fresco, before grabbing our gardening tools and working. Luckily, the weather agreed with us that day, providing a cool breeze off the coast.
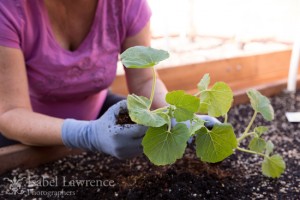 Here I am planting a healthy looking squash transplant into the freshly prepared garden beds. For best results, don’t disturb the squash’s roots when planting. Squash actually grows best from seeds sown directly in the soil.
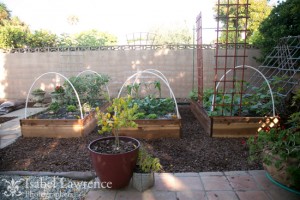 Just a few months later, the new kitchen garden is already lush with growing vegetables. Our family has been the lucky recipient of quite a few harvests. And I can truly say the produce tastes as pretty as it looks.
Kathy reports that she is “growing as much as I can squeeze in” to the beds.
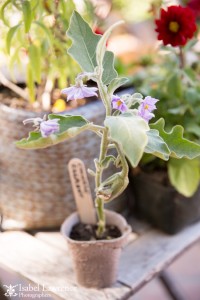 Bed one has eggplants, peppers, tomatillos, onions, carrots and parsnips. Bed two has corn, arugula, kale, cabbage, mustard, cauliflower and broccoli. Bed three has beans, zucchini, cantaloupe, cucumbers, butternut and spaghetti squash. She also has lettuce growing in a couple of smaller containers.
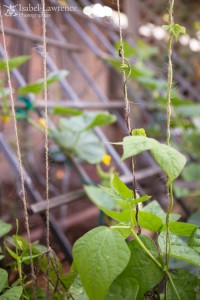 One of her most positive impressions so far has been growing beans. “By the time the beds were ready for planting, it was late in the season,” recalls Kathy. “I was worried it was too late in the season … but then the beans sprouted and all my anxiety melted away. Beans sure know how to bust through the soil and climb for the sky.”
To get continuous harvests, sow seeds for more pole beans every couple weeks. Always pick your beans religiously so they keep producing, but don’t pick wet plants to avoid spreading fungal diseases.
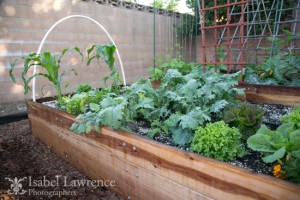 Despite Kathy’s pride in the bean harvest, she is most fond of her kale.
“It’s amazing,” says Kathy. “Snip a bounty of kale leaves one day, and the next day it has practically regrown again. Kale is one of those veggies that demonstrate the marvel of growing food.”
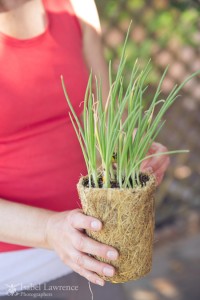 These days, Kathy has learned to appreciate helpful plant information.
“Transplants from nurseries or farmers markets rarely include this growing information,” she says. “Even some of the big heirloom seed companies have surprisingly little useful information on their seed packets. Spacing, days to harvest and watering needs are bare essentials that I look for now.”
Don’t rush out to spend a lot of money either, warns Kathy. When she needed something to use for hanging her spaghetti squash off the ground, she bought purple fishnet hose at the Dollar Store. So far, they seem to be working just fine.
We hope this vegetable garden tour inspires you to grow healthy foods at home too. Instead of nasty old weeds, you can enjoy delicious and beautiful foods with some sweat equity and a lust for good meals with friends.
Let Kathy’s garden be your inspiration too.
Several of these photos came from Isabel Gomes. You can see more of her photography at Isabellawrence.com.


Comments on this entry are closed.